
Sydney Freediving Guide | Beginner Essentials
Peter Letts Jun 21, 2023
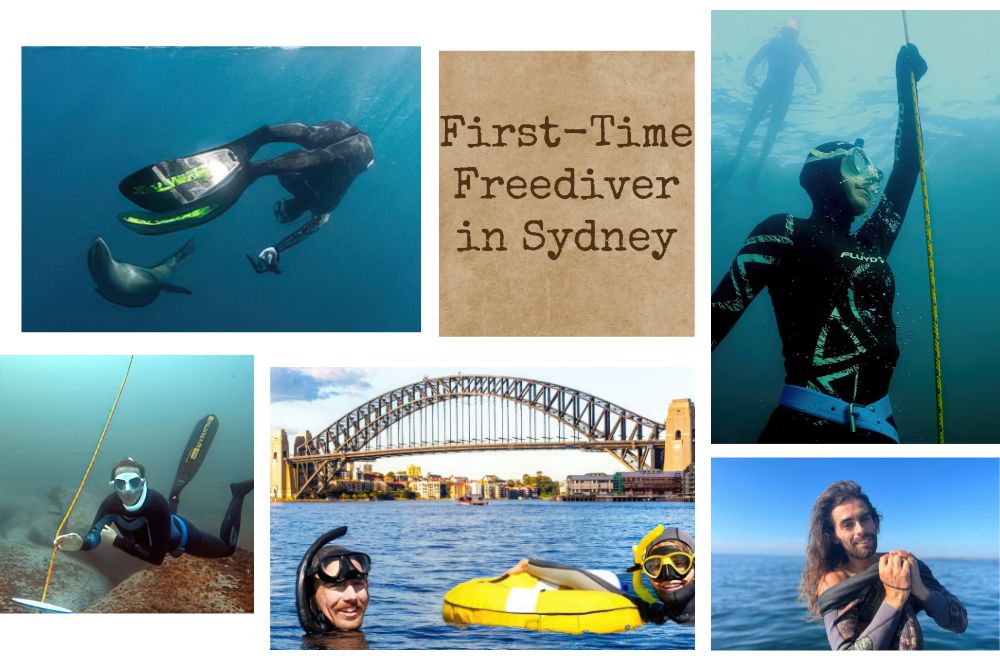
First-Time Freediver in Sydney? Here's What You Need to Know
Are you ready to embark on an unforgettable underwater adventure in one of the world's most stunning coastal cities? Sydney is not only famous for its iconic landmarks but also for its thriving freediving scene, crystal-clear waters, and diverse marine life. Dive into freediving as a first-time freediver in Sydney and discover the beauty of Sydney's underwater realm while reaping amazing health benefits and connecting with a passionate community of fellow enthusiasts!
Short Summary
-
Dive into the exhilarating world of Freediving in Sydney with amazing health benefits and stunning underwater landscapes!
-
Explore exciting spots like Shelly Beach, Lilli Pilli Baths & Kurnell, perfect for beginner freedivers!
-
Dive safely with a buddy by mastering essential skills such as relaxation, breathing techniques & equalization methods.
What is Freediving?

Freediving is an exhilarating form of underwater diving that relies on breath-holding and relaxation techniques to explore the ocean's depths. With its stunning coastal areas and vibrant marine life, Sydney attracts freedivers from all around the world who are eager to uncover its mesmerizing underwater world. This is where freediving begins for many enthusiasts.
As a beginner, you'll learn essential skills such as breathing techniques, equalization methods, and safety protocols, which will enable you to dive comfortably and safely. As you progress on your freediving journey, you'll experience incredible health benefits such as improved lung capacity, enhanced mental focus and discipline, and stress reduction and relaxation.
Freediving is not just a sport; it's a way to connect with nature, challenge yourself, and enter a state of tranquillity. With Sydney as your playground, you'll have ample opportunities to practice your skills, explore breathtaking dive spots, and join a thriving community of fellow freedivers.
So, are you ready to take the plunge and begin your underwater adventure?
Why Sydney is a Great Place for Freediving
Sydney is the epicentre of freediving in Australia, boasting the largest freediving scene in the country. Its welcoming community of divers explores the ocean every weekend, making it an amazing place to learn and grow as a freediver. Sydney's appeal lies in its diverse marine life, dramatic underwater landscapes, and historical shipwrecks, making it an ideal location to learn from Australia's leading freediving school.
Freediving Courses and dives in Sydney are held at Lilli Pilli Baths and Abyss Scuba Diving in Ramsgate, where experienced instructors run freediving courses for all levels, including pool sessions. You'll find plenty of dive spots accessible from the shore, offering beginners the chance to practice their skills in a safe and controlled environment.
So, whether you're a seasoned diver or just starting, Sydney is your perfect freediving hub!
Best Freediving Spots in Sydney for Beginners
Some of the best beginner-friendly freediving spots in Sydney include Shelly Beach, Cabbage Tree Bay, Bare Island, Kurnell, and Bondi. These locations are easily accessible and offer incredible sights at shallow depths, allowing you to progress towards the highest level of recreational freediving. Let's dive deeper into each of these amazing spots!
Lilli Pilli Baths
Lilli Pilli Baths is an exciting location along the Port Hacking River, where Sydney freediving courses often take place. With a maximum depth of 24 meters, Lilli Pilli is suitable for various dive sessions and skill levels. The visibility at Lilli Pilli is lower than the open ocean, but it still offers an exciting experience for those looking to take their diving to the next level. During winter, Lilli Pilli can get relatively colder compared to ocean sites, but it still offers an exciting experience for both beginners and experienced divers.
Shelly Beach
Shelly Beach, located in Manly, is an awesome protected marine reserve where you can practice skills learned in a freediving training program. You can easily walk straight into the water at Shelly Beach and pick your site, making it a great place to begin your freediving journey. Here, you can find fascinating marine species like cuttlefish, striped sea perch, and red rock cod.
Kurnell
Kurnell is known for its amazing sea dragons and spongy sea gardens, allowing you to explore Kurnell is known for its amazing sea dragons, friendly blue groper, and spongy sea gardens, allowing you to explore the underwater world quietly and marvel at its beauty.
Bare Island
Bare Island, an exciting small island with an amazing fort built on top of it by the old British colonials, offers a unique location to dive comfortably and explore. To dive at Bare Island, simply check out which side of the island looks calmer, follow the scuba divers in, and let your freediving journey begin.
Getting Started: Freediving Courses in Sydney

Abyss Scuba Diving is your one-stop destination for a variety of Sydney freediving courses and trips, including depth and pool training, mermaid courses, and underwater photography workshops. Catering to both beginners and experienced divers, Abyss Scuba Diving offers a comprehensive training program that focuses on making students feel safe and comfortable while learning exciting new techniques and skills during their dive sessions.
Whether you're just starting or looking to advance your freediving skills, Abyss Scuba Diving has a freediving course for you. From the foundational PADI Freediver course to the PADI Master Freediver course, you'll be guided by professional instructors who can help you achieve maximum performance and reach the highest level of recreational freediving. With our advanced freediving learning opportunities, you can truly unlock your potential.
So gear up and dive into the world of freediving with Australia's leading freediving school!
Essential Skills for Beginner Freedivers
As a beginner freediver, it's crucial to master essential skills such as relaxation, breath control, equalization techniques, proper finning techniques, and never diving alone. These skills will help you dive comfortably and safely while exploring underwater. Let's delve into these essential skills and learn how they can enhance your freediving experience.
Breathing Techniques
Breathing techniques play a vital role in freediving. Some of the techniques used by freedivers include diaphragmatic breathing, segmented breathing, square breathing, and lung stretching. These techniques are practised dry and aim to help the diver relax, lower their heart rate, and fill their lungs progressively, ensuring a comfortable and enjoyable experience during dive sessions.
Equalization Methods
Equalizing pressure in your ears and sinuses while diving is crucial for a comfy and secure dive experience. To achieve this, you can use popular equalization methods like the Frenzel technique, which is great for freediving. However, the Valsalva maneuver should do the trick if you're staying at more shallow depths. By mastering these techniques, you'll be on your way to a delightful and hassle-free time exploring the underwater world.
Safety and Buddy System
As a beginner freediver, it's crucial to master essential skills such as relaxation, breath control, equalization techniques, proper finning techniques, and never diving alone. These skills will help you dive comfortably and safely while exploring underwater. Let's delve into each of these essential skills and learn how they can enhance your freediving experience.
Safety is paramount in freediving, and the buddy system is an essential part of that. Diving with a trained buddy guarantees that someone is there to assist in case of an emergency. It's crucial to always dive with a buddy, know your limits, and follow the safety guidelines of the freediving organization you are diving with, ensuring a safe and enjoyable freediving journey.
Freediving Equipment Guide for Beginners
The right equipment is essential for a comfortable, safe, freediving experience. As a beginner, you'll need to invest in basic gear such as a mask, snorkel, fins, wetsuit, weight belt, and dive computer. Let's take a closer look at the essential equipment you'll need for your freediving journey.
Mask and Snorkel
A well-fitting mask and snorkel are crucial for freediving. When choosing a mask and snorkel, make sure they fit well, have low volume or excellent visibility, and are easy to clear. Some highly recommended masks for small faces include the Salvimar Neo, Ocean Hunter Silent and the Cressi Nano.
Fins
Fins are another essential piece of equipment for freediving. Two types of fins are available, including bi-fins and monofin, which carry in material, length, flexibility and foot pocket. Each type of fin offers different benefits, so choosing the right one for your needs and preferences is essential. Some popular options for freediving fins include the Cressi Gara Modular Impulse fins, Mares Razor Pro, Ocean Hunter Spirit and Fluyd Fibra.
Wetsuit
A wetsuit is essential for maintaining warmth and buoyancy while freediving. The type of wetsuit you choose depends on the water temperature and your personal preferences. Smooth-skin wetsuits are preferred among freediving athletes because they are hydrodynamic and help the freediver glide more easily through the water. When choosing a wetsuit, make sure it fits well, is comfortable, and provides the right level of insulation for your diving conditions.
Exploring Sydney's Marine Life
Sydney is home to a diverse and vibrant marine life, making freediving a truly mesmerizing experience. From the common species that inhabit the waters to the seasonal visitors that grace Sydney's shores, there's always something new and exciting to discover while exploring the underwater world. Let's take a closer look at the marine life you can expect to encounter during your freediving adventures in Sydney.
Common Species
Common species in Sydney's marine life include blue gropers, sea stars, pygmy and mosaic leatherjackets, red Indian fish, weedy seadragons, frogfish, sea horses, stingrays, cuttlefish, octopus, turtles, rays, and crustaceans such as lobster and blue swimmer. At Magic Point, for example, you can spot grey nurse sharks, wobbegongs, cuttlefish, squid, eels, blue groper, Port Jackson sharks, large schools of yellow tails, little stingrays, and Bull Rays.
Seasonal Visitors
Seasonal visitors to Sydney's marine life include seals, whales, and manta rays. These fascinating creatures can often be spotted during specific times of the year, offering freedivers a unique and thrilling experience. So keep an eye out for these majestic animals while exploring Sydney's waters!
Conservation Efforts
Conservation efforts in Sydney's waters are crucial to preserving the incredible marine life that calls it home. Initiatives such as the establishment of Magic Point, a conservation site located off Maroubra Beach, help protect and maintain the delicate balance of Sydney's underwater ecosystem. By being mindful of our impact on the environment and supporting conservation efforts, we can ensure that future generations can enjoy the beauty of Sydney's marine life.
Joining the Freediving Community
Connecting with the freediving community in Sydney is an essential part of your freediving journey. By joining this thriving community, you'll have access to invaluable resources, support, and camaraderie that will enhance your freediving experience. There are several ways to connect with the Sydney freediving community, including social media groups, local events and competitions, and networking opportunities.
Social Media Groups
Social media groups for freedivers in Sydney are exciting online communities on platforms such as Facebook and Instagram, providing a space for freedivers to connect and share experiences. Some awesome examples of social media groups for freedivers in Sydney include "Freediving Community", "Abyss Freediving Group", and "Freediving Family Sydney"
Local Events and Competition
Sydney is a great place to experience the thrill of freediving. There are a number of events and competitions held throughout the year, giving you the chance to test your skills and meet other freedivers.
One of Sydney's most popular freediving events is the Sydney Freediving Festival. The festival is held in October and features competitions, workshops, and demonstrations. There is also a social event on Saturday night where you can meet other freedivers and enjoy food and drinks.
Networking Opportunities
Networking opportunities for freedivers in Sydney can be found through clubs and schools, local events and competitions, and social media groups. By connecting with fellow freedivers, you'll gain access to a wealth of knowledge, support, and camaraderie that will enrich your freediving experience. So dive in and join the Sydney freediving community today!
Health Benefits of Freediving
Freediving is an exciting sport and a way to connect with nature, and it offers amazing health benefits. Some of the incredible benefits of freediving include improved lung capacity, enhanced mental focus and discipline, and stress reduction and relaxation. Let's explore each of these benefits in more detail.
Improved Lung Capacity
Improved lung capacity is one of the key benefits of freediving. By practising proper breathing techniques and engaging in regular aerobic exercise, you can significantly improve your lung capacity and, consequently, your overall freediving performance. Increased lung capacity allows you to stay underwater longer, making your underwater adventures even more enjoyable.
Enhanced Mental Focus and Discipline
Enhanced mental focus and discipline are other notable benefits of freediving. Freediving can help boost self-confidence, strengthen resilience, and better understand one's amazing capabilities. Techniques such as visualization, meditation, and breathing exercises can help improve mental focus and discipline, making you a better and more focused freediver.
Stress Reduction and Relaxation
Lastly, stress reduction and relaxation are essential benefits of freediving. The practice of freediving can help reduce stress and anxiety, providing an amazing sense of relaxation and peace. Techniques such as deep breathing, progressive muscle relaxation, and visualization can help you achieve a state of relaxation, allowing you to enjoy your freediving experience to the fullest.
Safety Tips for First-Time Freedivers
Safety is paramount in freediving, especially for first-time freedivers. Following a few essential safety tips can ensure a safe and enjoyable experience while exploring the underwater world. Some of the key safety tips for first-time freedivers include always diving with a buddy, knowing your limits, and being aware of the environment.
Always Dive with a Buddy
Diving with a buddy is important for safety, communication, and sharing the amazing experience. A buddy can offer helpful reminders about air and depth, provide wonderful camaraderie, and be there in case of an emergency. It is the number one rule of freediving safety to never dive alone, so always ensure you have a trusted buddy.
Know Your Limits
Knowing your limits when freediving is crucial for preventing accidents and injuries. It's essential to be aware of your abilities and the conditions of the environment in which you're diving. By staying within your limits, you'll ensure a safe and enjoyable freediving experience while allowing yourself to grow and improve.
Summary
Freediving in Sydney is an unforgettable experience that combines the thrill of exploring the underwater world with amazing health benefits and a supportive community. By mastering essential skills, investing in the right equipment, and joining the thriving Sydney freediving community, you'll be well on your way to enjoying this incredible sport. So take the plunge and dive into the world of freediving in Sydney – an underwater adventure awaits!
Frequently Asked Questions
How deep can a beginner freediver go?
As a beginner freediver, you can safely dive to a depth of 10-16m, allowing you to explore the mesmerizing beauty and incredible underwater biodiversity!
With experience and proper training, more experienced divers can dive up to 32 meters deep, unveiling the wonders of the deep sea. Put on your wetsuit and jump in - the underwater world is waiting!
What is the number 1 rule in freediving?
The number one rule in free diving is always dive with a buddy. Never freedive alone! Knowing a fellow diver is there to monitor your progress and offer help if needed can make all the difference when it comes to safety.
A companion can provide reassurance and lend an extra pair of eyes to the task at hand, so stick with the buddy system for ultimate safety.
How do you free dive for beginners?
For those just getting started in free diving, the key to success is to dive safely and confidently with a buddy. Taking a course to learn basic safety skills and understanding your body's capabilities is also important, as well as having the essential equipment.
Once you relax and enjoy the experience, you'll be hooked!
How long does it take to become a freediver?
Becoming a freediver takes dedication, focus and practice. With the right instructor, you can learn the essential principles and progress through confined and open-water sessions to begin shallow dives in as little as two to three days.
However, reaching higher levels of competence and performance can take many months or years.
How long can free divers hold their breath?
Are you wondering how long an average person can hold their breath? Believe it or not, free divers have been known to hold their breath underwater for more than 10 minutes!
Most untrained people can only hold their breath for about 30 seconds without needing to gasp for air. Amazing!

 Trusted by Sydney divers